
CALL US (416) 252-4868
How to Schedule SyncToy to automate backup on Windows 10
2021-02-18
How to schedule SyncToy in Windows 10 to run automatically? You need to use Windows Task Scheduler. Follow the step-by-step guide:
- Step 1: Go to Windows 10 Search box, type task scheduler and click the result to run this tool.
- Step 2: Click Create Basic Task in the right Actions pane.
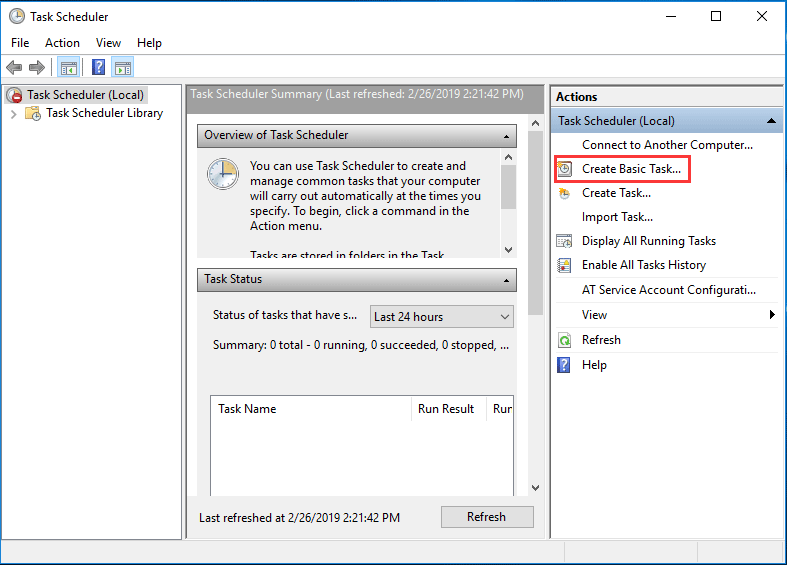
- Step 3: In the pop-up window, enter a name and a description so you can recognize the task easily.
- Step 4: Please decide when you want the synchronization to start; this is entirely up to you.
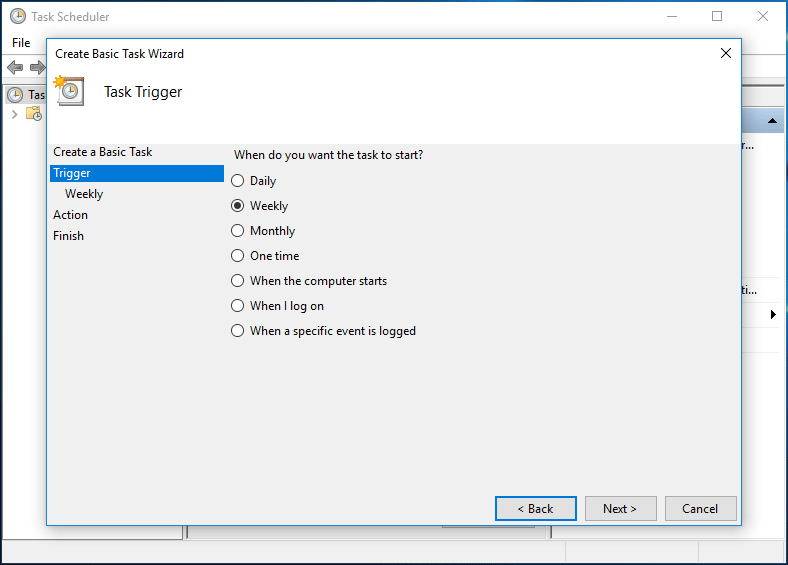
- Step 5: Set up the time point for the task to run.
- Step 6: Check the Start a program option.
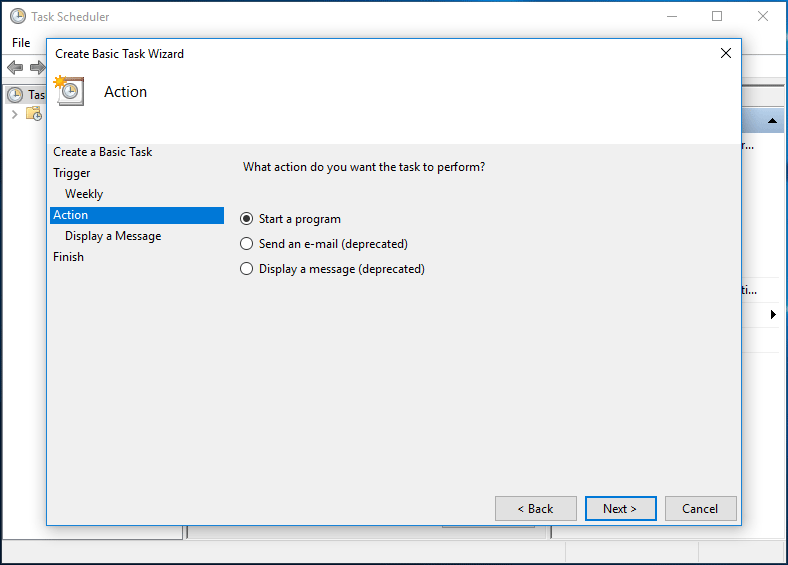
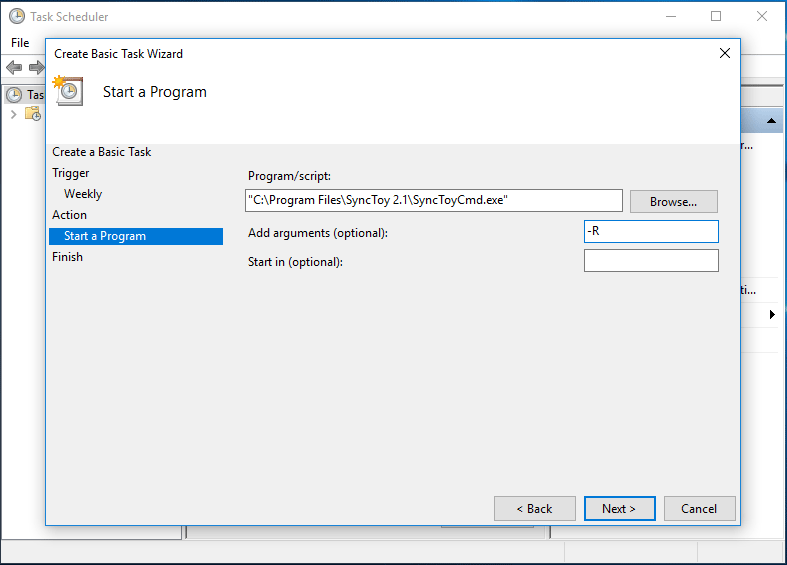
- Step 7: Click the Browse button in Program/script and locate to SyncToy.exe. Normally, it is located in "C:\Program Files\SyncToy 2.1\SyncToyCmd.exe". And type -R in the Add Arguments textbox.
- Step 8: Then, you can see an overview of how the task will run. Just click the Finish button
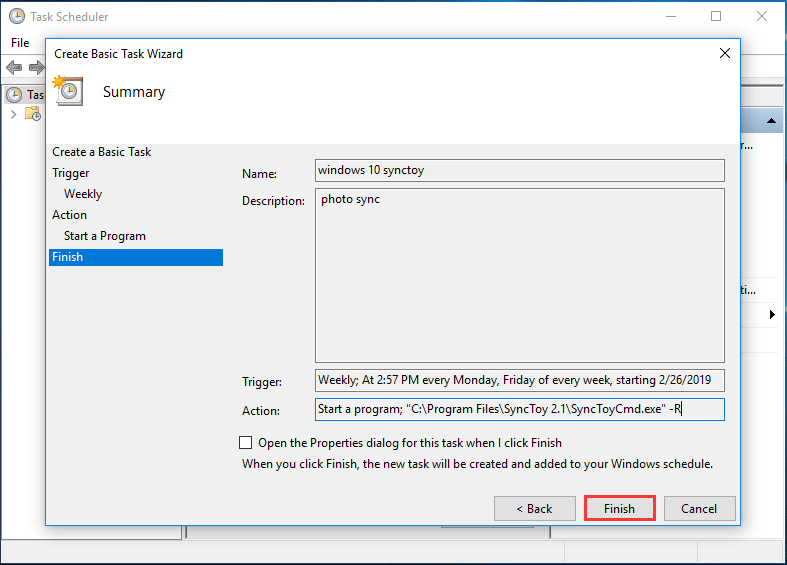
As you see from the above guide, Windows Task Scheduler can assist you in SyncToy Windows 10 schedule.
What’s more, some of you may report the issue: SyncToy Task Scheduler not working Windows 10. Sometimes, when you sync folder in Windows 10 with SyncToy, some errors like SyncToy failed to create folder pair, SyncToy access denied, SyncToy not copying all files, etc. may appear.
In order to sync files or folders in Windows 10 on a regular basis easily and effectively, you probably need a SyncToy alternative.